This one applies to all JetBrains products with git integration.
You can also be inspired by this post and use rebase/fixup with just plain old git. Just do git rebase --interactive to do essentially the same stuff, just without all the visual aid.
The problem with dirty histories
You commit something.
[123abc]Fix issue with article image CSS
Then you commit something else.
[123abc]Fix issue with article image CSS[456def]Always run cloudfront invalidation in deploy script
Whoops! You forgot something when fixing the article image CSS.
[123abc]Fix issue with article image CSS[456def]Always run cloudfront invalidation in deploy script[789ghi]Whoops! Add missing semi colon.
We're all professionals here. We don't want a dirty git history like that! Thankfully, you didn't push yet, so you can just go ahead and fix that right up!
Re-arranging and merging history
What we want, is to combine the "woops" commit and the "fix CSS" commit into one, as if we never even did our oopsie. If the oopsie was actually deployed to production or somehing, having it in the git log is valuable. But when it's not even pushed yet, you should remove it.
Something like this:
[123abc]Fix issue with article image CSS + Whoops! Add missing semi colon[456def]Always run cloudfront invalidation in deploy script
Using rebase and fixup
We can do this! As mentioned above, you can do it in plain git with git rebase --interactive <sha here>. Here's how to do it visually in IntelliJ
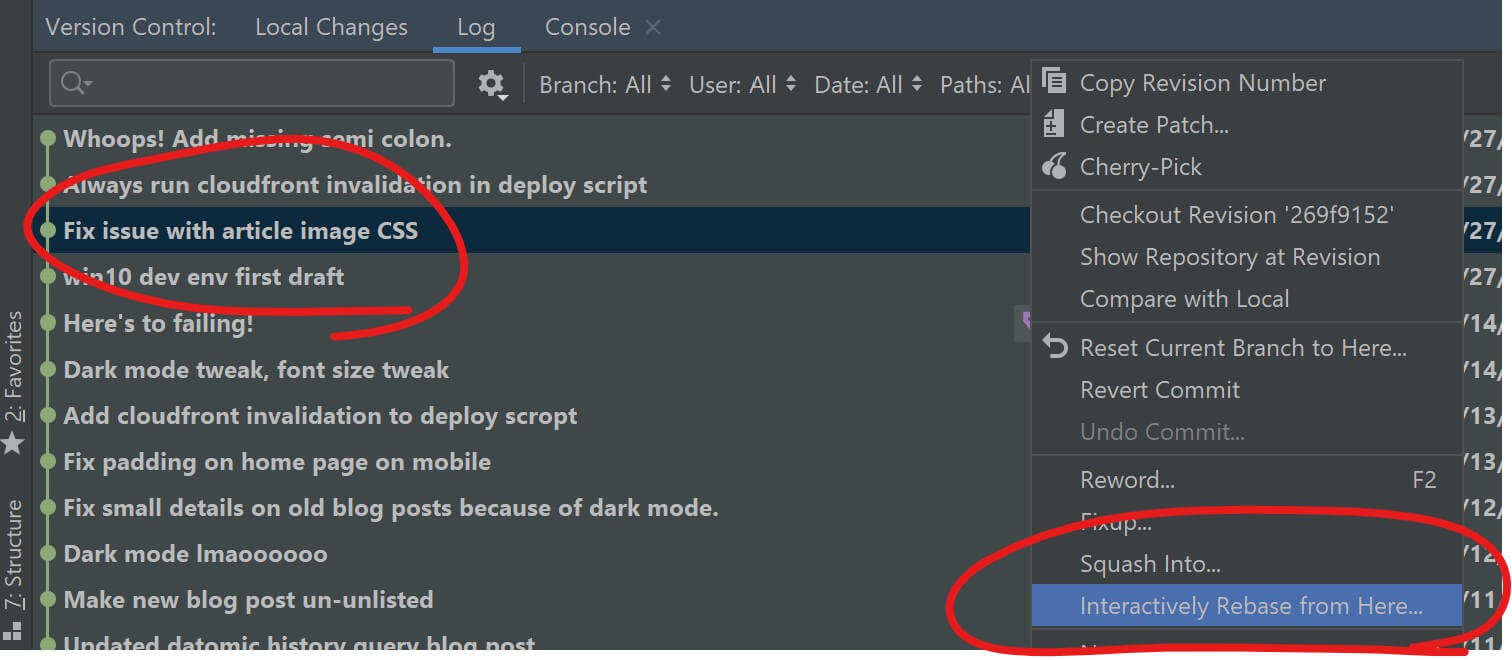
First, select the earliest commit in the history that you want to operate on. In our case, we want to merge the 3rd most recent and the most recent commit. So we select the 3rd most recent, and choose "Interactively Rebase from Here..."
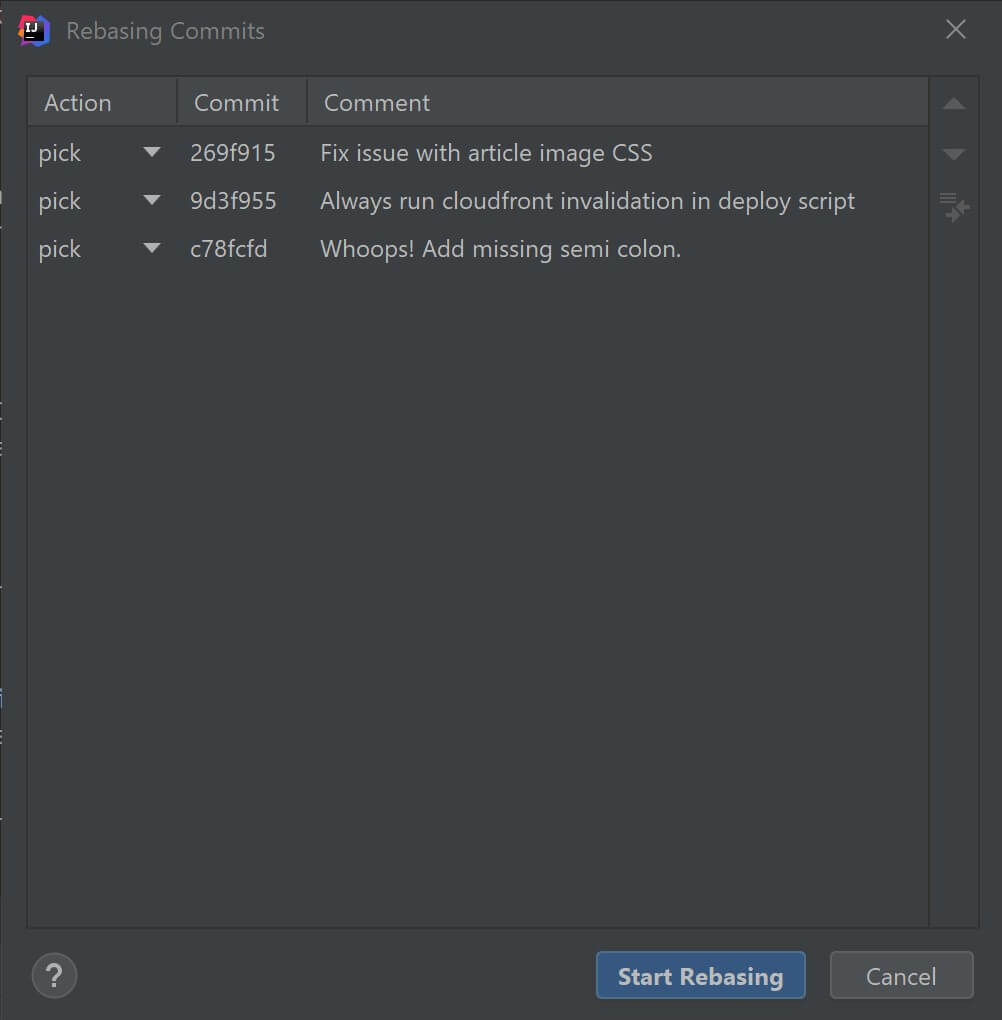
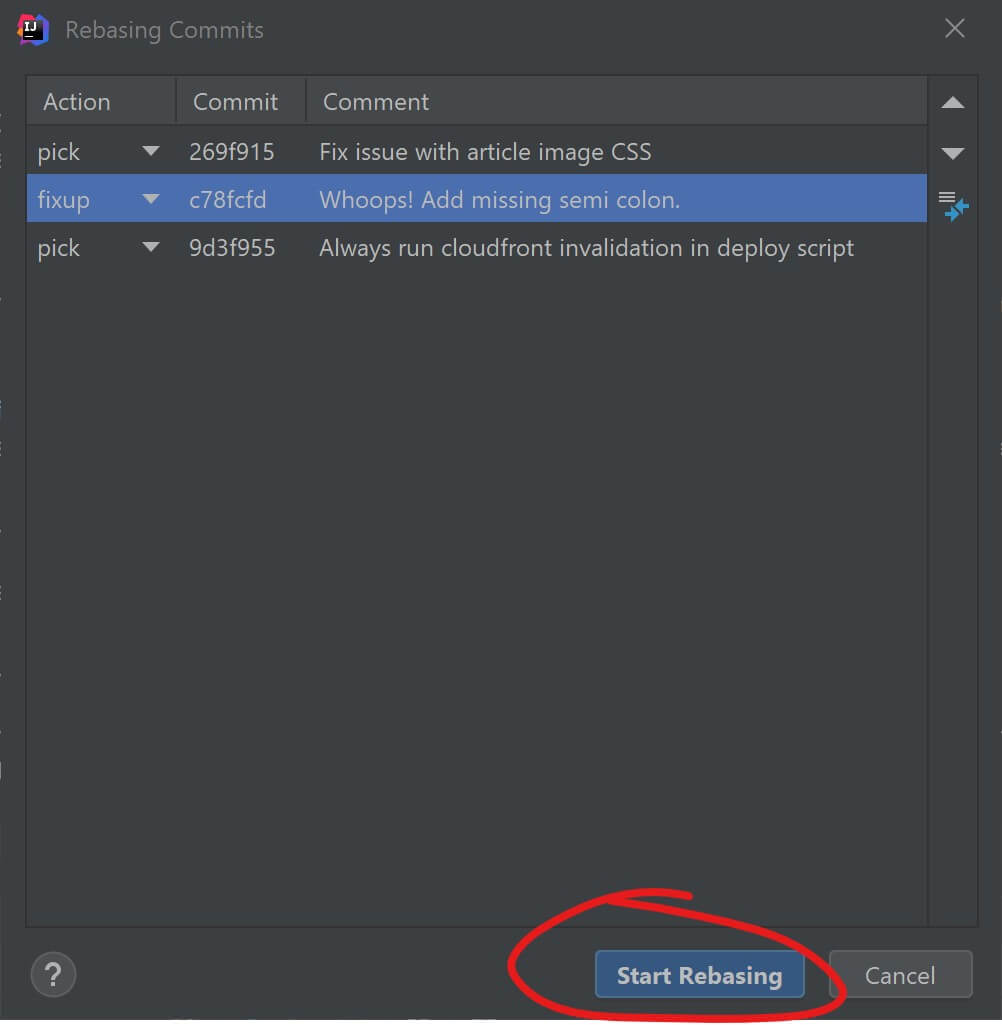
You get a popup showing your commits, in reverse order.
What we want to do at this point, is to merge the last commit on that list into the first commit on that list. To do that, we first move it one step up by selecting it and clicking those small arrows on the side there.
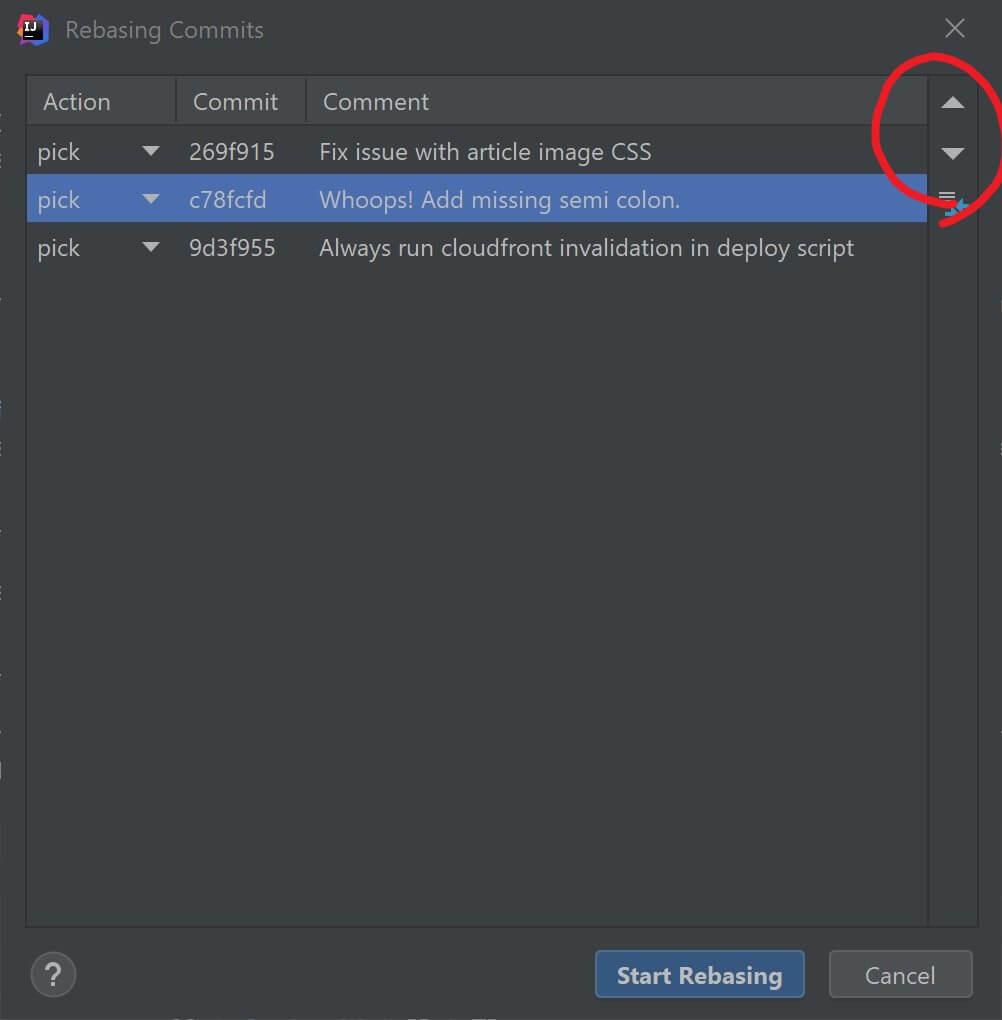
The reason we do that, is that this list of commit is what Git will apply various operations on, in the order they appear (from top to bottom). That is why the commits come in reverse order.
The default operation is "pick", which just means "use this commit". I.e. don't change anything, just leave it as is.
The one we want to choose, is "fixup". Click the little arrow for the "whoops" commit, which is now the 2nd commit in the list.
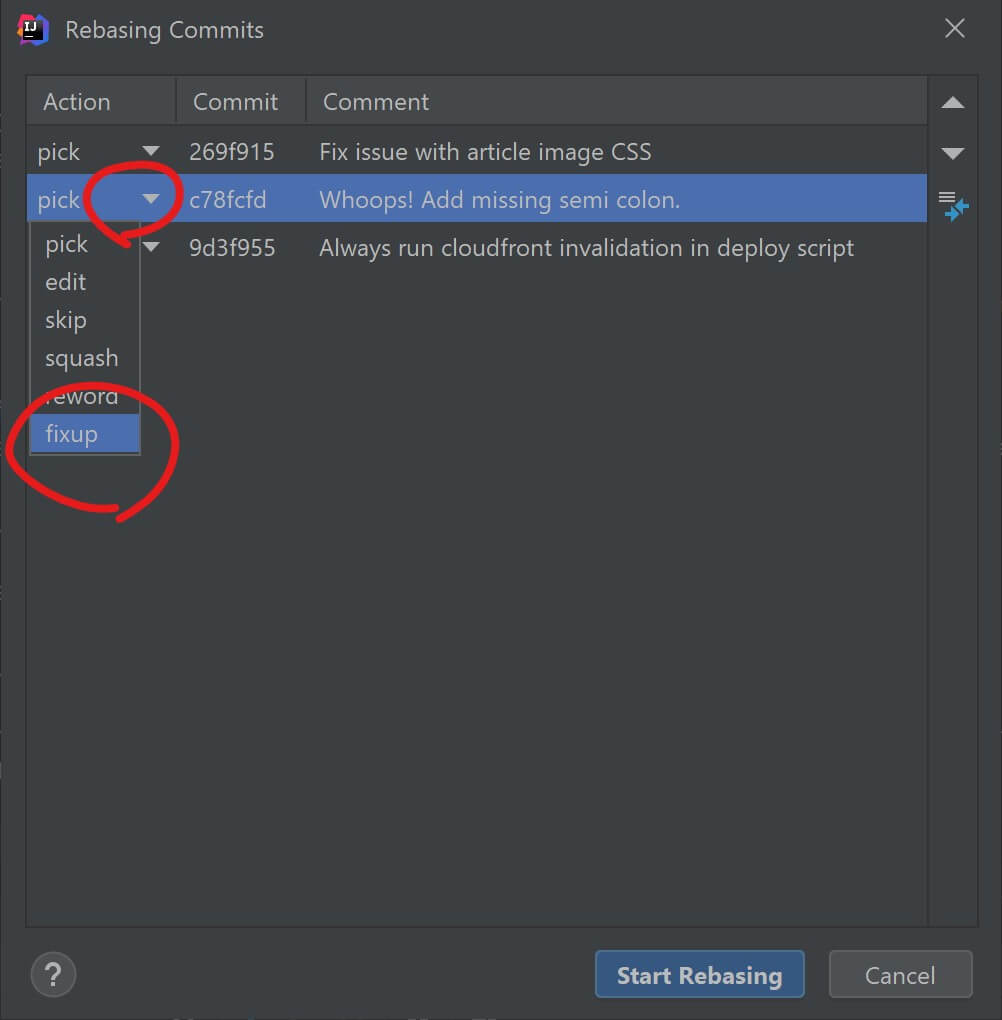
That means that Git will take the commit marked as "fixup", amend it into the commit before it, and discard the commit message. Click the button do make that happen.
And voila, you're done! Your history will now look like this:
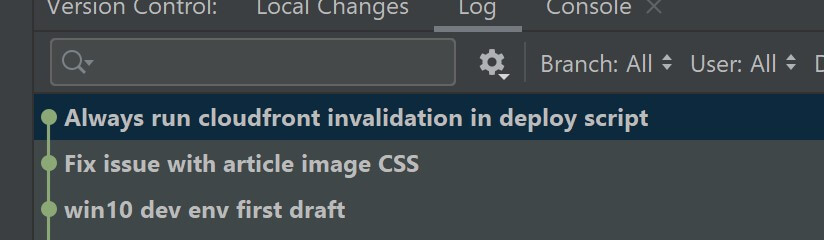
The commits have been merged, and it will be as if you never made your mistake!
It's nice to not have to admit to making silly mistakes. And it's even nicer that your small (or big) mistakes doesn't clutter up the git history.
One more thing
I actually used this feature for real when writing this article! The three commits I made above were made to this project. But they were just faux commits that I wanted to get rid of.
So first, I created a commit for this article (which I'm now adding to). Then, I chose the first faux commit and started a rebase. I made the popup look like this:
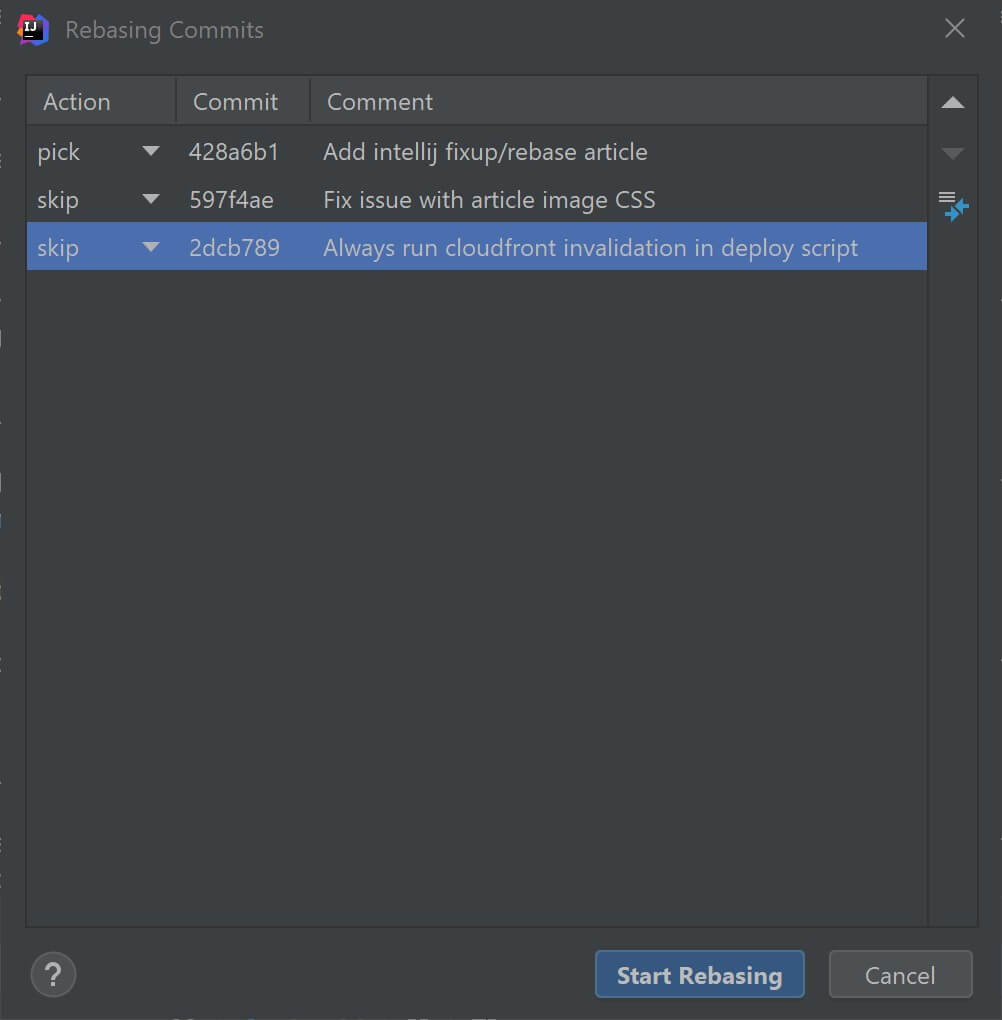
I moved the commit for this article to the top, and let it stay on "pick". Then I picked "skip" - i.e. get rid of - my two faux commits.
And just like that, they are gone from the project.
Pretty nice!